5 Simple Steps on How to Tie a Hair Rig for Carp Fishing
Why Every Carp Angler Should Learn the Hair Rig
If you want to catch more carp and improve your hookup ratio, learning how to tie a hair rig is one of the most important skills in carp fishing. A properly tied hair rig presents your bait naturally, reduces suspicion, and improves hooking efficiency — making it one of the most effective carp fishing rigs available today.
This step by step hair rig guide walks you through everything you need to know, including required tools, easy hair rig instructions, and pro tips for getting the perfect bait presentation every time.
If you’re just getting into carp fishing or want to improve your overall technique, make sure to check out our Freshwater Fishing Guides. It’s packed with tips, strategies, and tutorials to help you catch more fish across multiple species and techniques.
Master the Hair Rig: A Beginner’s Guide
The hair rig changed the way anglers target carp. Unlike traditional setups where bait sits on the hook, the hair rig lets your bait sit just off the hook on a “hair,” allowing carp to suck it in naturally. This increases your chances of hooking fish in the bottom lip — one of the safest and strongest hook holds possible.
Whether you’re new and looking for a beginner hair rig tutorial or just need a refresher, this guide will help you tie a strong, reliable, and effective rig step by step.
Materials You’ll Need


As an Amazon Associate, I earn from qualifying purchases. This means that if you click on one of the links in this post and make a purchase, I may receive a small commission at no extra cost to you. I only recommend products I personally use and believe will help improve your fishing experience.
| Tool / Material | Purpose |
|---|---|
| Braid or coated hooklink (e.g., 20 lb) | Main rig line. |
| Carp fishing hook (size 2–8) | The hook for your rig. |
| Fishing shrink tubing / kicker | Ensures better hook rotation and secure lip hookups. |
| Anti-tangle sleeve | Prevents tangling on casts. |
| Quick-change swivel | For attaching your rig to your mainline. |
| Baiting needle | To thread boilies, corn, or pellets. |
| Bait stops | Keeps bait secure. |
| Bait Pegs | These bait pegs are designed to secure boilies, corn, pellets, or other baits on your hair rig, preventing them from sliding off during casting or when carp are feeding aggressively. |
| Scissors | To trim knots and tubing. |
| Boilies or other bait | Works great with floating bait or boilies. |
| Lighter or steam | Optional, for shrinking tubing neatly. |
I personally like using the FUSIGO Carp Fishing Kit because it includes anti-tangle sleeves, quick-change swivels, and lead clips rubber, giving you everything you need to build multiple high-quality hair rigs in one set.
Step 1 — Tie the Hair Loop

Start your simple hair rig setup by cutting about 10 inches of braid. At one end, tie a small loop — this is where your bait stop will sit later.
Steps:
- Fold the end of your braid and form a loop.
- Tie an overhand knot and tighten it.
- Trim off any excess.
Pro Tip: Keep the loop small (about 1 cm) for cleaner bait presentation. This is the foundation for a reliable hair rig knot tutorial.
Step 2 — Thread the Hook & Set Hair Length

Thread the tag end of your braid through the back of the hook eye and slide your bait stop onto the loop using your baiting needle.
Steps:
- Thread the loop through your bait using the baiting needle.
- Secure the bait with a boilie stop.
- Adjust the distance between your bait and hook bend (5mm to 15mm).
Pro Tip: Keep the hair shorter for small baits and slightly longer for larger boilies. This setup is key when making a reliable fishing rig for carp.
Step 3 — Tie the Knotless Knot

The knotless knot is one of the best knots for hair rigs and ensures strength and proper bait alignment.
Steps:
- Hold the bait and hook in place, keeping your hair at the right length.
- Wrap the braid around the hook shank 7–8 times.
- Thread the tag end back through the back of the hook eye.
- Pull everything tight for a secure finish.
Pro Tip: Wrapping toward the hook bend creates a better angle, helping the hook catch perfectly.
Step 4 — Add the Shrink Tubing & Anti-Tangle Sleeve

Slide your fishing shrink tubing or kicker over the hook eye and steam it into a slight curve. Then add the anti-tangle sleeve to the swivel end of your braid.
Steps:
- Slide the tubing into place over your knot.
- Heat gently with steam or hot water to form a natural curve.
- Slide the anti-tangle sleeve onto the other end of your rig.
Pro Tip: A curved tubing improves advanced hair rig techniques by increasing hook turning speed, leading to stronger hook holds.
Step 5 — Attach to a Quick-Change Swivel

Finish your fishing hook hair rig setup by connecting the rig to a quick-change swivel.
Steps:
- Tie the swivel using a figure-eight or grinner knot.
- Slide the anti-tangle sleeve neatly over the swivel.
- Clip it to your lead system, and you’re ready to fish.
Pro Tip: Pre-tie several rigs before heading out so you can swap quickly on the bank.
Once you’ve mastered how to tie a hair rig and start landing more carp, don’t forget to share your catches with our community! Submit your photo on our Slab Shots page for a chance to win prizes like Bass Pro gift cards and be featured on our site.
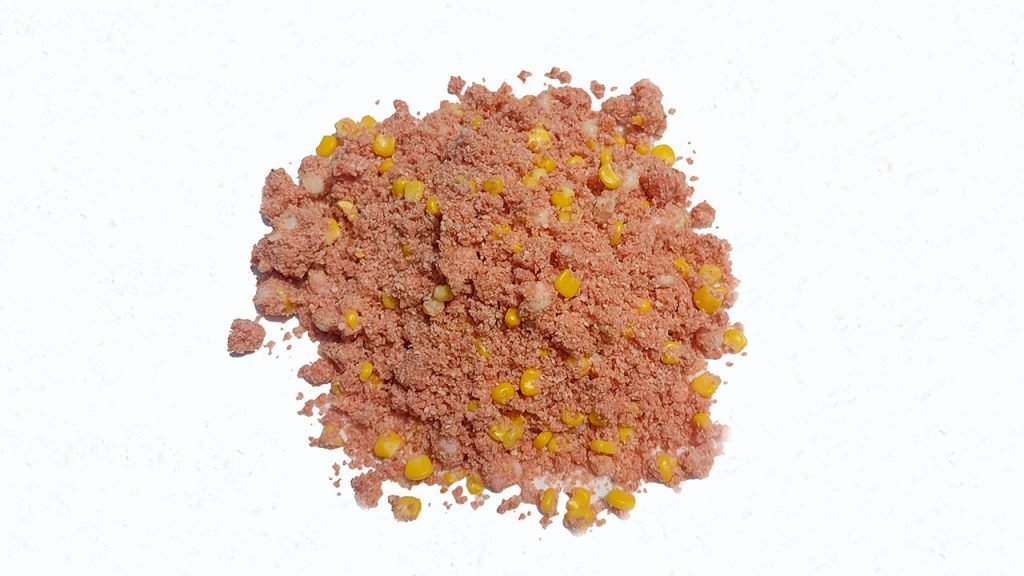
How to Bait a Hair rig

Once you’ve learned how to tie a hair rig, the next step is baiting it correctly for the most natural presentation possible. The purpose of a hair rig is to let the bait sit just below the hook so the carp can suck it in easily without feeling any resistance. Properly baiting your rig ensures better hookups and improves your overall fishing success, especially when targeting wary or pressured fish.
Start by selecting your bait — most anglers prefer boilies, artificial corn, pellets, or tiger nuts. Using a baiting needle, carefully pierce your bait straight through the center and slide it onto the hair section of your rig. Once the bait reaches the end of the hair loop, insert a small plastic bait stop to secure it in place. This prevents the bait from sliding off during casting or when fish are feeding aggressively around your rig.

The key is maintaining the right hair length between your hook and bait. A short hair (around 5mm) works best for smaller baits like sweetcorn or pellets, while a slightly longer hair (10–15mm) is ideal for larger boilies or snowman setups. The correct spacing allows the hook to flip efficiently in the carp’s mouth, dramatically improving hook-hold strength and reducing missed bites.
If you’re following a boilie rig tutorial, make sure your bait matches your fishing conditions. For pressured waters, smaller, neutral-colored baits often work best, while highly flavored boilies can be more effective when targeting larger carp in less pressured lakes. With the right baiting technique, your hair rig becomes one of the most effective carp fishing rigs for getting consistent, reliable results.
Pro Tips for Better Results
- Always test your knots for strength before casting.
- Use braided hooklink material for natural bait presentation.
- Keep multiple carp fishing bait rigs pre-tied for quick swaps.
- Match bait size, hook size, and hair length for the best results.
- For pressured waters, use smaller baits and shorter hairs.
Using a hair rig often results in safer hook holds, but proper handling is just as important. Visit our Fish Care Resources to learn how to safely release carp and improve survival rates while keeping your catches healthy.
Common carp are an incredible species that can live for over 47 years and reach weights of 75+ pounds, making them one of the longest-living and most resilient freshwater fish in North America. To ensure future generations can enjoy catching them, it’s essential to handle them properly and practice responsible catch-and-release techniques. You can learn more about their life cycle and distribution from the Texas Parks & Wildlife Department’s carp resource.
Common Mistakes Beginners Make
- Making the hair loop too long can cause missed hookups.
- Wrapping the braid in the wrong direction prevents the hook from flipping properly.
- Forgetting to add the shrink tubing reduces hooking efficiency.
- Using a line that’s too stiff can make the bait presentation look unnatural.
💡Takeaways
📌Mastering the Hair Rig Improves Carp Fishing Success
Learning how to tie a hair rig is one of the most valuable skills for any carp angler. Unlike traditional setups where the bait sits on the hook, the hair rig allows your bait to sit just off the hook on a short “hair,” creating a natural presentation that makes carp less suspicious. This setup increases your hookup rate, improves hooking efficiency, and helps target bigger, wary fish effectively.📌The Right Tools Make a Perfect Hair Rig
Using the correct materials ensures a strong, reliable setup. Essential tools include a braided hooklink, carp fishing hook, shrink tubing or kickers, anti-tangle sleeves, quick-change swivels, baiting needles, boilie stops, and your preferred bait. Matching your hook size, bait size, and hair length is critical for achieving the perfect bait presentation and maximizing your rig’s effectiveness.📌Five Simple Steps to Tie a Hair Rig
Creating an effective carp fishing hair rig involves five straightforward steps: tying the hair loop, threading the hook and setting the hair length, securing the knotless knot, adding shrink tubing and an anti-tangle sleeve, and attaching the rig to a quick-change swivel. Following these steps ensures your bait sits naturally and improves your chances of catching carp in both pressured and clear-water conditions.📌How to Bait a Hair Rig for Perfect Presentation
After tying your rig, baiting it correctly is essential for success. Use a baiting needle to thread your boilies, corn, or pellets onto the hair and secure them with a boilie stop. Maintain a short hair length for smaller baits and slightly longer hairs for bigger boilies or snowman setups. Proper bait placement allows the hook to flip more effectively in the carp’s mouth, resulting in stronger, safer hook holds and fewer missed bites.📌Pro Tips for More Carp on the Bank
To improve your results, always test your knots for strength before casting, use braided hooklinks for a natural presentation, and keep multiple rigs pre-tied for faster swaps. Adjust your bait size, hook size, and hair length to match fishing conditions, and for pressured waters, consider using smaller, subtle baits for a more natural look that attracts cautious fish.
FAQ
What is a hair rig?
A hair rig is one of the most effective carp fishing rigs ever created. Instead of putting the bait directly on the hook, the bait is threaded onto a short piece of line, called the “hair,” that hangs below the hook shank. This allows the carp to suck in the bait naturally without feeling resistance, which improves hook-ups and reduces the chances of the fish spitting out the hook. Hair rigs are commonly used for boilies, pellets, sweetcorn, and artificial baits, making them perfect for stealthy presentations in both pressured and clear-water conditions.
How do you set up a hair rig?
Setting up a hair rig involves a few simple steps. First, you tie a small overhand loop at the end of your braided line to hold the bait stop. Then, thread the line through the back of the hook eye, adjust the correct hair length based on your bait size, and secure the hook using a knotless knot. Finally, add a piece of shrink tubing or a kicker over the hook eye to improve the turning action and finish the rig with a quick-change swivel and anti-tangle sleeve. If you want to learn exactly how to tie a hair rig, following a detailed step-by-step guide ensures perfect bait presentation and maximum hooking efficiency.
Why is it called a hair rig?
The name “hair rig” comes from the original design, where early carp anglers used an actual human hair to attach the bait instead of threading it directly on the hook. Over time, the setup evolved into using braided line rather than real hair, but the name stuck. The idea behind this rig was to make bait presentation more natural and increase the chances of catching cautious fish, and that same principle still makes the hair rig one of the most effective carp fishing rigs today.
Why is the 360 rig banned?
The 360 rig, once popular among carp anglers, is banned on many fisheries because it allows the hook to rotate freely around the eye, creating a higher risk of deep hooking and mouth damage to fish. While the rig can be very effective at hooking carp, many fisheries have introduced restrictions to protect fish welfare. If you want a safer alternative, many anglers now use Ronnie rigs, blowback rigs, or traditional hair rigs, which offer similar hook-hold efficiency but are less harmful to the fish.
What is the difference between a Ronnie rig and a 360 rig?
The Ronnie rig and 360 rig are both designed to keep the hook sitting aggressively and improve hook-up rates, but they work differently. The 360 rig allows the hook to spin freely around the eye, which increases hooking potential but also increases the risk of mouth damage, which is why many fisheries ban it. The Ronnie rig, on the other hand, fixes the hook in a semi-locked position using a shrink tube or kicker while still offering excellent turning and hooking performance. For anglers looking for an effective but fish-safe setup, the Ronnie rig has become the more popular option compared to the 360 rig.
How to tie a stiff hinge rig?
To tie a stiff hinge rig, you need a stiff boom section, a short hinge section, and a pop-up bait. First, attach a chod hook to a short stiff filament using a knotless knot. Then, connect that to a flexible boom section using a strong loop knot, creating a hinge between the two parts. Add a swivel to the boom’s end so it connects neatly to your mainline or lead system. Finally, steam the boom section straight for a clean presentation and add a pop-up bait on the chod hook. While this setup is different from learning how to tie a hair rig, the stiff hinge rig is perfect for presenting pop-ups over debris or silty lakebeds where you need your bait to sit perfectly above the bottom.
Jesse Earl – Author
Jesse Earl is a passionate freshwater angler and the founder of Reel Activities. When he’s not testing gear or writing how-to guides, you’ll find him exploring hidden lakes, chasing walleye, or casting from the shoreline with a cup of gas station coffee in hand.